
Most AI music videos fall apart in the same place: people generate a handful of cool-looking clips and then try to glue them to a song afterwards. The clips don't match the energy, the cuts don't land on the beat, and the main character looks like a different person in every shot. The result feels like a slideshow, not a music video.
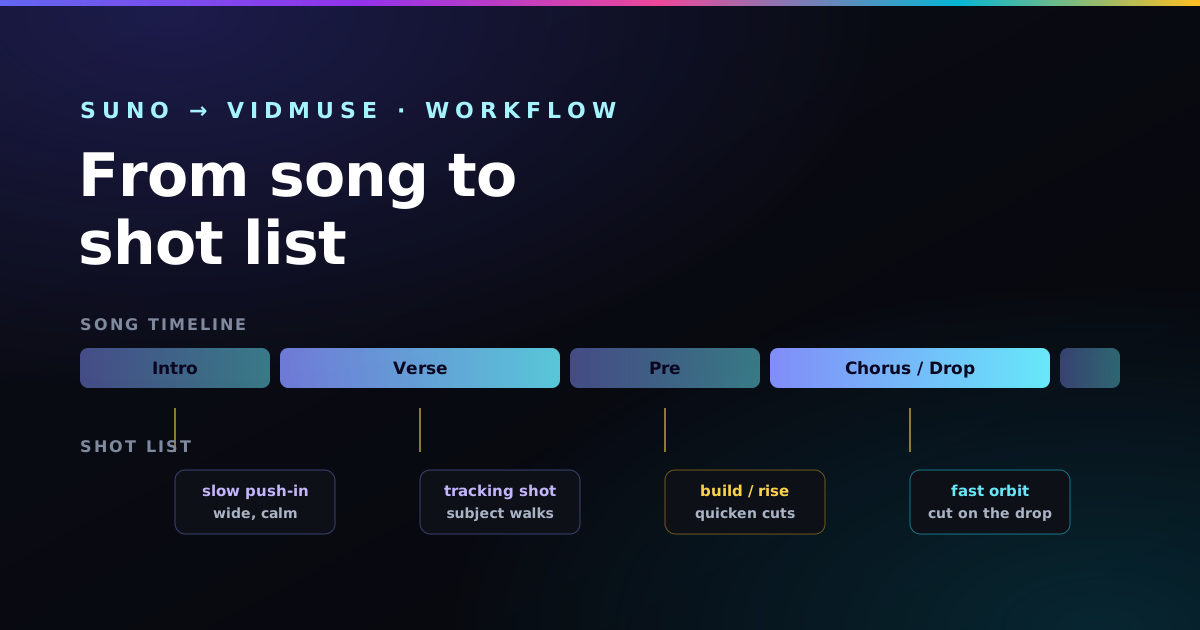
The professionals work the other way round. They start from the song, break it into sections, and decide before generating anything what each section should look like. That plan is the shot list — and once you have one, Vidmuse is just filling in the pictures.
Key takeaways
- Plan the video from the song's structure, not the other way around.
- Give every section a shot: setting, subject, camera move, energy.
- Match camera speed to energy — slow in verses, fast in the chorus.
- Reuse an identical subject description so your character stays consistent.
Step 1: Map your song's sections
Play your finished Suno track and write down its timeline — the same sections you used when you wrote it: intro, verse, pre-chorus, chorus, bridge, outro. Note roughly where each one starts and how it feels. You're looking for the energy curve: where the song is calm, where it builds, and where it peaks. That curve is the skeleton of your video.
0:00  Intro     — calm, sparse
0:12  Verse 1   — steady, storytelling
0:36  Pre       — building, tension rising
0:48  Chorus    — peak energy, the hook
1:12  Verse 2   — steady again
...
Step 2: Give every section a shot
Now turn each section into a shot with four ingredients. Keep them in the same order every time so your prompts stay consistent:
- Setting — where we are (a rainy neon street, a sunlit field, a dark studio).
- Subject — who or what we're watching, described identically every time.
- Camera move — how the camera behaves (slow push-in, tracking shot, orbit, handheld).
- Energy — calm, building, or peak, to match the section.
A filled-in shot list might read:
Intro   → wide, slow push-in on subject under a streetlamp, calm
Verse 1 → tracking shot beside subject walking, steady
Pre     → low angle, camera rising, cuts quicken, tension
Chorus  → fast orbit around subject, neon flares, peak — cut on the drop
Step 3: Match camera movement to energy
This is the single biggest thing that makes an AI video feel "directed". The camera should breathe with the music:
- Calm sections → slow push-ins, gentle drifts, static wides. Let the shot sit.
- Building sections → rising cranes, slow zooms, gradually quicker cuts.
- Peak sections → fast orbits, whip-pans, dynamic moves, and your hardest cuts landing on the beat.
For the exact phrasing that makes Vidmuse move the camera the way you want, the camera-movement prompt guide has a full vocabulary you can lift directly into your shot list.
Cut on the beat. Generate each clip to roughly the length of a musical phrase, then place your cuts on strong beats — especially the first beat of the chorus or the drop. A cut that lands on the beat feels deliberate; one that lands off it feels like a mistake.
Step 4: Keep your character consistent
Nothing breaks the illusion faster than a hero who changes face between shots. The fix is discipline: write one detailed subject description and paste the exact same words into every shot prompt. Only the action and the camera move should change.
Subject (reuse verbatim): a young woman with short curly black hair,
silver jacket, red scarf, soft cinematic lighting

Shot A: [subject], walking slowly, tracking shot from the side
Shot B: [subject], looking up as rain falls, slow push-in
Shot C: [subject], spinning as neon flares, fast orbit
Keep wardrobe, lighting, and setting steady across the video unless a change is intentional (a new location for the bridge, say). Consistency in the details buys you freedom in the action.
Step 5: Generate, assemble, and cut
With the shot list done, the rest is mechanical:
- Generate each shot in Vidmuse, one section at a time, regenerating any clip that strays from your description.
- Drop the clips onto a timeline in song order, lined up with their sections.
- Trim each clip so its cut lands on the beat — tighten in the chorus, let it breathe in the verses.
- Watch the whole thing once with your eyes closed for the first half — if it sounds like the cuts are on the beat, they probably look right too.
If you're new to the end-to-end process — generating the track, storyboarding, and stitching it together — start with the full Suno + Vidmuse music-video workflow, then use this shot-list method to plan the visuals in detail.
A reusable shot-list template
Copy this, fill one row per section, and you've got a plan before you generate a single frame:
SECTION | SETTING | SUBJECT (verbatim) | CAMERA MOVE | ENERGY
Intro   |         |                    |             |
Verse 1 |         |                    |             |
Pre     |         |                    |             |
Chorus  |         |                    |             | peak — cut on beat
Frequently asked questions
What exactly is a shot list?
A simple plan mapping each song section to a shot — setting, subject, camera move and energy. It turns a finished track into a clip-by-clip recipe you can generate in Vidmuse.
How do I sync clips to the beat?
Match camera speed to energy — slow in calm sections, fast in the chorus — and plan cuts to land on strong beats. Generating clips to the length of a phrase makes this easy.
How do I keep the same character across clips?
Reuse an identical, detailed subject description in every prompt and keep wardrobe, lighting and setting consistent. Only change the action and camera move per shot.
Plan the prompts while you plan the video
The Vidmuse builder in the free Paddy Prompt Studio assembles clean shot prompts with camera moves and a locked subject — perfect for working through a shot list.
Open the Vidmuse Builder →